需求描述
之前写过一篇利用sjs在小程序实现无卡顿元素拖拽的分享:【小程序】小程序sjs事件及拖拽组件开发。
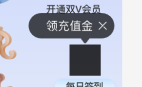
这次需求做了一个气泡提示的容器组件,需要在遇到屏幕边缘时动态向内调整气泡的位置,就想到利用sjs事件来实现。

要求:
- 气泡箭头对准该功能中间位置
- 当气泡箭头无法居中位于功能,靠近页面左/右边缘时,气泡距离页面左右边距统一为16px箭头位置对准该功能
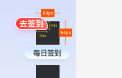
还有一个角标的组件,正常是在元素右上角,要实现到达页面右边缘时变为左上角。

事件文档
sjs事件官方文档:小程序文档 - SJS 响应事件。
在 .sjs 文件中定义函数:
1
2
3
4
5
6
7
8
9
10
11
12
13
14
15
16
17
18
19
20
|
function handleEvent(event, ownerComponent) {
event.instance.setStyle({
'font-size': '28rpx',
});
return false;
}
function handlePropChange(newValue, oldValue, ownerComponent, instance) {
}
export default {
handleEvent,
handlePropChange,
};
|
接着,可以在 .axml 中使用回调:
1
2
3
4
5
6
| <import-sjs from="./index.sjs" name="sjs"></import-sjs>
<view
data-foo="{{foo}}"
change:data-foo="{{sjs.handlePropChange}}"
onTouchStart="{{sjs.handleEvent}}"
></view>
|
可以看到,我们可以绑定一个data属性,监听这个属性的变化触发事件,在事件中接收到newValue, oldValue, ownerComponent, instance四个参数。其中ownerComponent可以调用所属页面或组件的一些方法。instance可以调用当前dom元素的一些方法。
实现思路
我们展示气泡时,给气泡动态传入文案,就可以监听这个文案变化。
此时气泡渲染,我们通过instance.getBoundingClientRect获取当前气泡元素距离屏幕的位置,并进行计算,然后将气泡通过instance.setStyle设置transform进行偏移,即可实现效果。
实现气泡组件结构如下:
1
2
3
4
5
6
7
8
9
10
11
12
13
14
15
| <view class="container">
<view class="bubble">
<view class="bubble-content">
<text class="bubble-text">{{text}}</text>
<view class="bubble-close" catchTap="handleClose">
<image class="close-icon" src="https://xiaojinhe-cdn.iyoudui.cn/chongya/v3/icon-close-white.png" mode="aspectFit" />
</view>
</view>
<view class="bubble-arrow"></view>
</view>
<slot />
</view>
|
给气泡绑定sjs事件
我们在触及屏幕边缘时,要将气泡向内移动,包含内部的文字和关闭按钮一起。但是下方的箭头是不动的,还要对准元素的中心位。
我们给.bubble-content传递data-text,监听data-text变化。
1
2
3
4
5
6
7
8
9
10
11
12
13
14
15
16
17
| <import-sjs from="./index.sjs" name="{handleBubbleTextChange}"></import-sjs>
<view class="container">
<view class="bubble">
<view class="bubble-content" data-text="{{text}}" change:data-text="{{handleBubbleTextChange}}">
<text class="bubble-text">{{text}}</text>
<view class="bubble-close" catchTap="handleClose">
<image class="close-icon" src="https://xiaojinhe-cdn.iyoudui.cn/chongya/v3/icon-close-white.png" mode="aspectFit" />
</view>
</view>
<view class="bubble-arrow"></view>
</view>
<slot />
</view>
|
1
2
3
4
5
6
7
8
9
| export const handleBubbleTextChange = (newVal, oldVal, ownerComponent, instance) => {
if (newVal && !oldVal) {
const rect = instance.getBoundingClientRect()
console.log('rect', rect)
}
}
|
先实现一边的计算逻辑
我们从打印rect。可以得到left, right, width, height等信息。这里我们先找到一个屏幕右边超出的气泡,打印。发现left和width可以用,right数字有问题先忽略。
没有可用的right值,我们要计算超出右边屏幕的距离就需要用到屏幕宽度信息。在页面和组件的js中我们可以通过my.getSystemInfoSync()得到,但是在sjs中,我们需要从外部传入。在js中得到,通过data绑定上,再通过instance.getDataset()得到。
上面需求要求距离屏幕宽度16px。我们用left + width + 16, 减去屏幕宽度,得到超出的距离,设置transform。但是这里还是有问题,16是750设计稿上的rpx,我们要转换为对应的px,也需要用屏幕宽度和750比例计算一下。
注意这里getSystemInfoSync拿到的对象,包含screenWidth和windowWidth,模拟器上两个值是一样的,真实设备的dpr不同,这里我们要用windowWidth。
最终实现如下:
1
2
3
4
5
6
7
8
9
10
11
12
13
14
15
16
17
| <import-sjs from="./index.sjs" name="{handleBubbleTextChange}"></import-sjs>
<view class="container">
<view class="bubble">
<view class="bubble-content" data-ww="{{windowWidth}}" data-text="{{text}}" change:data-text="{{handleBubbleTextChange}}">
<text class="bubble-text">{{text}}</text>
<view class="bubble-close" catchTap="handleClose">
<image class="close-icon" src="https://xiaojinhe-cdn.iyoudui.cn/chongya/v3/icon-close-white.png" mode="aspectFit" />
</view>
</view>
<view class="bubble-arrow"></view>
</view>
<slot />
</view>
|
1
2
3
4
5
6
7
8
9
10
11
12
13
14
15
16
17
18
19
20
21
22
23
| function rpx2px (rpx, ww) {
return rpx * ww / 750
}
export const handleBubbleTextChange = (newVal, oldVal, ownerComponent, instance) => {
if (newVal && !oldVal) {
const rect = instance.getBoundingClientRect()
console.log('rect', rect)
const ww = instance.getDataset().ww
console.log('ww', ww)
const edge = rpx2px(16, ww)
if (rect.left + rect.width + edge > ww) {
const newLeft = ww - rect.width - edge
const delta = newLeft - rect.left
instance.setStyle({
transform: `translateX(${delta}px)`,
})
}
}
}
|
这就实现了右边的逻辑。测试效果ok。
再实现另一边
再实现另一边就更简单了,左边直接用left和edge比较。
1
2
3
4
5
6
7
| if (rect.left < edge) {
const newLeft = edge
const delta = newLeft - rect.left
instance.setStyle({
transform: `translateX(${delta}px)`,
})
}
|
到这里,就实现了两边的动态调整逻辑。
角标逻辑
角标的就更简单了。再写一个事件,到达屏幕右边缘,调用instance.addClass,添加一个样式。通过css控制。
完整代码
组件axml:
1
2
3
4
5
6
7
8
9
10
11
12
13
14
15
16
17
18
19
20
21
22
23
24
25
26
| <import-sjs from="./index.sjs" name="{handleBadgeTextChange,handleBubbleTextChange}"></import-sjs>
<view class="popup-container" a:if="{{showPopup && uid}}" catchTap="handleTap"
>
<view class="badge {{launchUndertakeData.launchUndertakePosition}}" a:if="{{type === 'badge' && !closed}}" style="background-color: {{badgeBgColor}}" data-ww="{{windowWidth}}" data-sw="{{screenWidth}}" data-text="{{text}}" change:data-text="{{handleBadgeTextChange}}" catchTap="handleClick">
<text class="badge-text" style="color: {{badgeTextColor || '#fff'}}">{{text}}</text>
</view>
<view class="bubble" a:if="{{type === 'bubble' && !closed}}" catchTap="handleClick">
<view class="bubble-inner">
<view class="bubble-content" data-ww="{{windowWidth}}" data-sw="{{screenWidth}}" data-text="{{text}}" change:data-text="{{handleBubbleTextChange}}">
<text class="bubble-text">{{text}}</text>
<view class="bubble-close" catchTap="handleClose">
<image class="close-icon" src="https://xiaojinhe-cdn.iyoudui.cn/chongya/v3/icon-close-white.png" mode="aspectFit" />
</view>
</view><view class="bubble-arrow"></view>
</view>
</view>
<slot></slot>
</view>
<slot a:else></slot>
|
sjs:
1
2
3
4
5
6
7
8
9
10
11
12
13
14
15
16
17
18
19
20
21
22
23
24
25
26
27
28
29
30
31
32
33
34
35
36
37
38
39
40
41
42
43
44
45
46
47
48
49
50
51
52
| function rpx2px (rpx, ww) {
return rpx * ww / 750
}
export const handleBadgeTextChange = (newVal, oldVal, ownerComponent, instance) => {
if (newVal && !oldVal) {
const rect = instance.getBoundingClientRect()
console.log('rect', rect)
const ww = instance.getDataset().ww
const edge = rpx2px(16, ww)
console.log('ww', ww)
if (rect.left + rect.width + edge > ww) {
instance.addClass('reverse')
}
}
}
export const handleBubbleTextChange = (newVal, oldVal, ownerComponent, instance) => {
if (newVal && !oldVal) {
const rect = instance.getBoundingClientRect()
console.log('rect', rect)
const ww = instance.getDataset().ww
console.log('ww', ww)
const edge = rpx2px(16, ww)
if (rect.left + rect.width + edge > ww) {
const newLeft = ww - rect.width - edge
const delta = newLeft - rect.left
instance.setStyle({
transform: `translateX(${delta}px)`,
})
} else if (rect.left < edge) {
const newLeft = edge
const delta = newLeft - rect.left
instance.setStyle({
transform: `translateX(${delta}px)`,
})
}
}
}
|